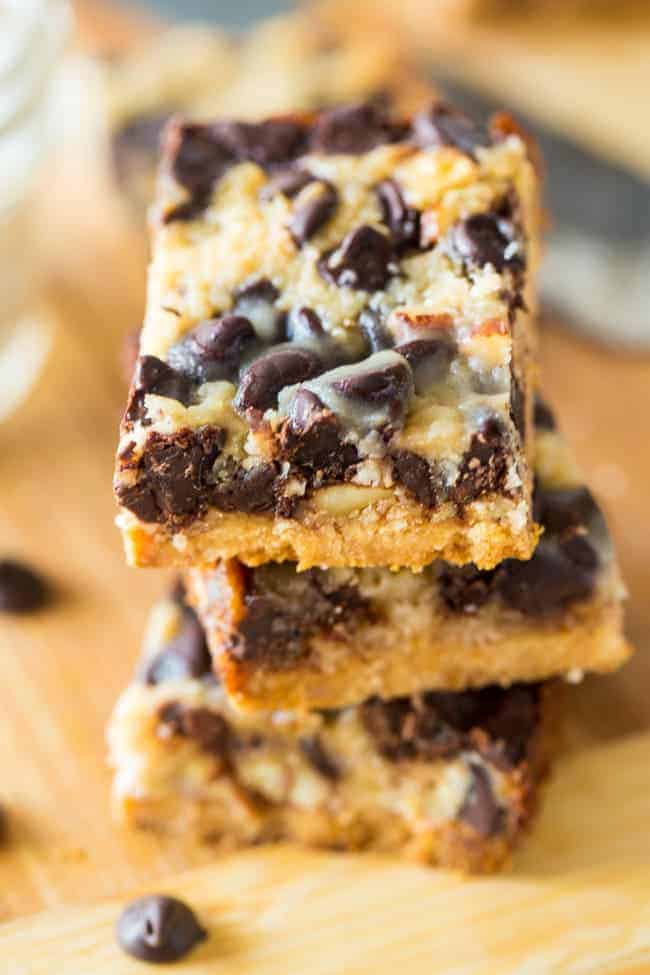
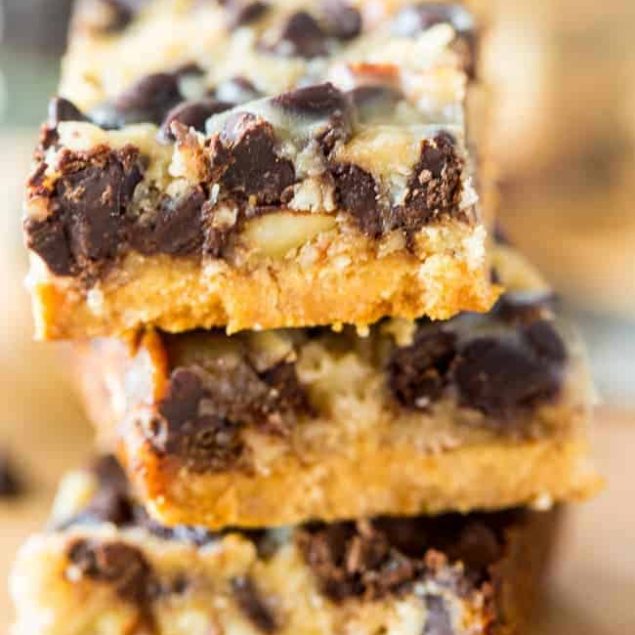
These Paleo Magic Cookie Bars are a more wholesome remake of the classic dessert.
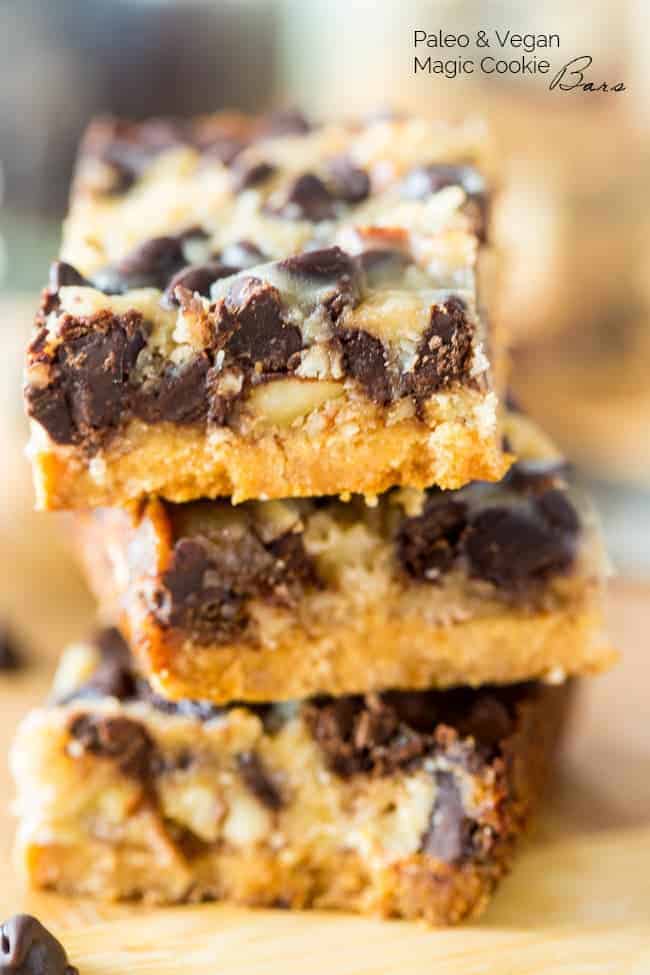
When I tell you that this healthier take on magic cookie bars is pure, well, magic, I mean it. Seriously, who needs a magic wand when you’ve got these bars in your life? Imagine biting into a sweet, crunchy crust, followed by toasted almonds, melty chocolate, and coconut flakes that create a decadent flavor explosion with every bite. Oh yeah, and did I mention my version of these classic dessert bars is fully Paleo, gluten-free, and easy to make vegan? Yep, it’s like perfection in a pan.
Now, these bars aren’t just about taste. You won’t find any refined sugars or funky ingredients here. This recipe uses pantry staples like coconut flour, coconut milk, honey (or agave), and a few nuts and chocolate chips. It’s simple, it’s satisfying, and it’s all kinds of delicious. And the best part is you can make these in no time. Just press the crust into the pan, toast your nuts, mix up the gooey topping, and boom—you’ve got yourself a treat that’s magical, not just in flavor but in ease, too.
Are These Paleo Magic Cookie Bars Healthy?
While I’d consider these magic cookie bars a healthier alternative to most desserts (especially those laden with refined sugar, preservatives, and artificial ingredients), they are still meant to be enjoyed as a dessert. In other words, in moderation. Coconut milk and coconut oil are high in saturated fat. And while chocolate chips and honey (or agave) bring the sweetness, they’re best enjoyed in moderation, too. Dark chocolate does contain some antioxidants, but balance is key to keeping this treat in the “healthy-ish” zone.
There are some other healthy qualities to these delicious cookie bars. Coconut flour is a source of fiber, iron, potassium, and protein, while almonds are loaded with vitamin E, magnesium, and healthy fats. So, while these bars are all about indulgence, they’ve got just enough wholesome ingredients to feel good about going back for seconds. Maybe thirds. No judgment.
The Magic Behind Magic Cookie Bars
It’s thought that magic cookie bars rose to fame in the 1960s, when the recipe started appearing on the backs of Eagle Brand sweetened condensed milk cans. Back then, convenience was everything—and this dessert delivered that on all fronts. It was love at first bite for busy families who wanted something quick, easy, and irresistibly good. The bars became a staple of potlucks and bake sales, earning a permanent place in dessert history.
But like so many classic culinary creations, these bars have evolved with time, and this recipe is proof of that. By swapping out the condensed milk for creamy coconut milk and honey and ditching the graham crackers for a coconut flour crust, we’ve given the classic a modern makeover that holds its own in today’s contemporary kitchens.
How To Make Ahead And Store
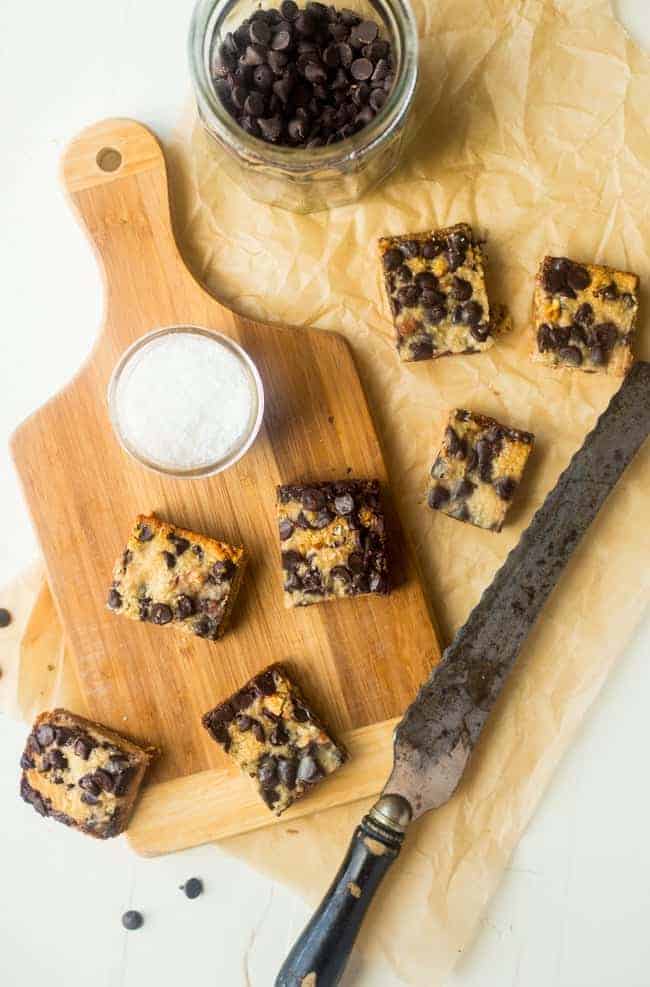
Store leftover bars in an airtight container in the fridge for up to 1 week. Just be prepared for them to disappear way before that—they’re that good. If you want to keep them fresh longer, layer them on top of a parchment paper-lined baking sheet and pop them into the freezer until just frozen through. Then transfer them to a freezer-safe container. They’ll keep for up to 3 months.
Serving Suggestions
If you’re a big fan of magic cookie bars, you will fall completely in love with all the delicious variations out there. Try these Pumpkin Spice Magic Cookie Bars for a fall-inspired twist, or these Carrot Cake Magic Cookie Bars for some true indulgence. Want to really try a unique take? Give these Tropical Magic Cookie Bars a taste!
Recipe
Ingredients
- 1 14-ounce can full-fat coconut milk do not use low-fat
- 1/2 cup plus 3 tablespoons honey divided (agave for vegan version)
- 1/3 cup coconut oil at room temperature (should be the consistency of softened butter)
- 66 grams coconut flour sifted
- Pinch of salt
- 2/3 cup almonds (87 grams)
- 3/4 cup dark chocolate chips dairy-free for vegan option
- 1/2 cup unsweetened coconut flakes
Instructions
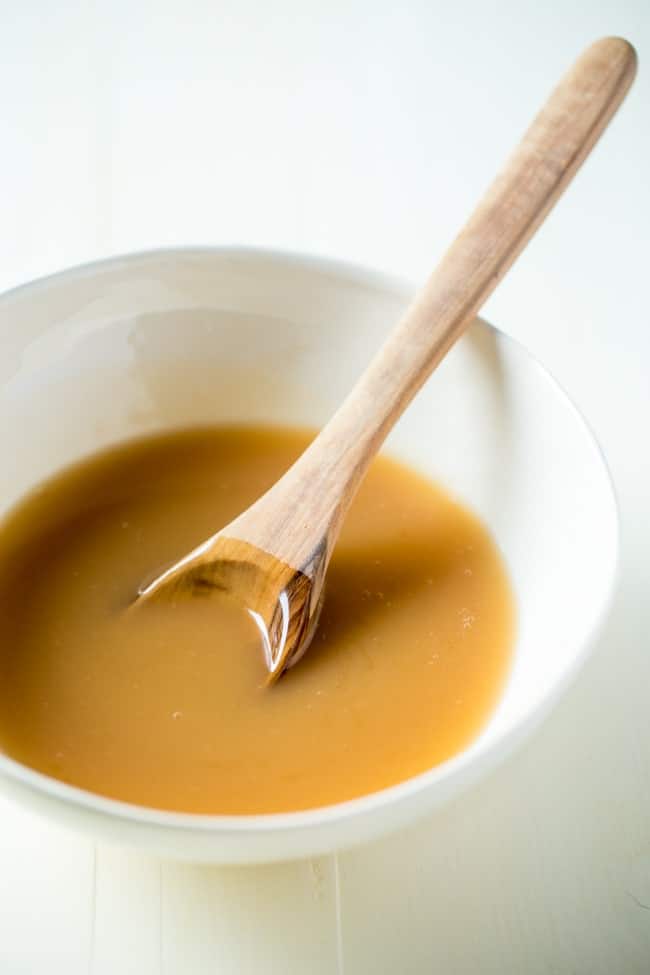
- In a large pot over high heat, whisk together the can of coconut milk and 1/2 cup of honey (or agave), reserving the remaining honey for later. Bring the mixture to a boil and boil for 1 minute, stirring constantly. Then, turn the heat down to medium and and simmer for 20 minutes, stirring frequently, until the sauce reduces by about half.
- Transfer the sauce to a large measuring cup to cool while you make the crust. Note: You should have about 1 1/4 cups of sauce left after cooking it.
- Once you've made the sauce, heat your oven to 350 degrees Fahrenheit and line an 8×8-inch pan with parchment paper, spraying the sides generously with coconut oil spray. Note: It helps to spray the bottom of the pan before putting in the parchment paper to secure it.
- In a large bowl, using an electric hand mixer, beat the remaining 3 tablespoons of honey with the coconut oil until smooth and creamy. Stir in the flour and pinch of salt until a wet dough forms.
- Press the dough evenly into the bottom of the pan. This will be a little bit tough, just be patient with it. I found it easiest to use the palms of my hands, and rinse them off every so often, until the dough was pressed in.
- Bake the crust just until lightly golden brown, about 7 minutes. While crust is baking, chop the almonds.
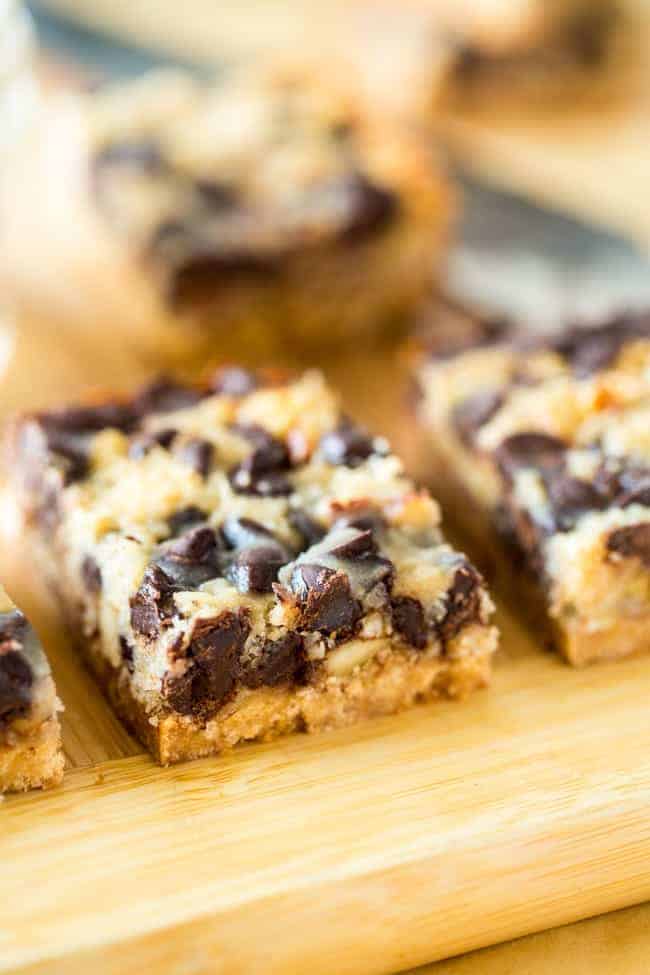
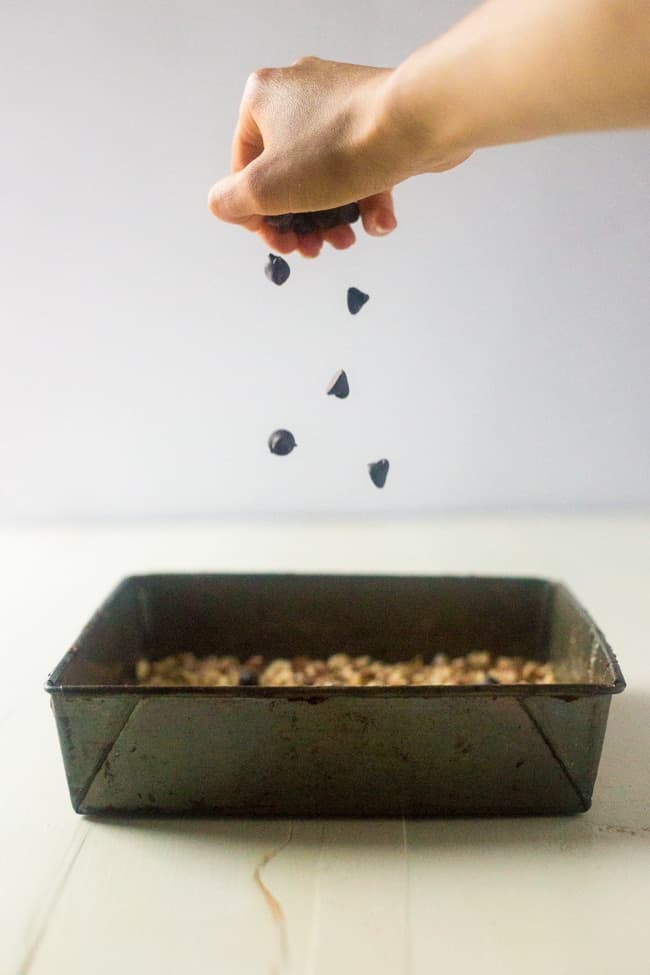
- As soon as the crust comes out of the oven, sprinkle the chopped almonds on top, and lightly press them into the crust. Then, sprinkle on the chocolate chips evenly, followed by the coconut flakes.
- Pour 1 cup of the slightly cooled coconut milk mixture (you'll have a little left over, but you don't need to use it all for these bars) evenly over the top of the surface. Then, gently shake the pan around until the coconut milk mixture begins to sink between the layers.
- Place into the oven and bake until the sides are lightly golden brown, about 27-28 minutes.
- Remove from the oven and cool to room temperature. Then, cover with tinfoil and refrigerate overnight. Note: The bars MUST be refrigerated overnight. Do not skip this step.
- The next day, run a very sharp knife around the edge of the pan, slice into bars, and enjoy!
Tips & Notes:
Nutrition Info:
Recipes written and produced on Food Faith Fitness are for informational purposes only.

Can I use regular flour
Hi Karen, It is a bit tricky, coconut flour absorbs more liquid. You can try using regular flour, but you might need to make some adjustments to the liquid ingredients. Good luck!